OkeyStokey
Active Member
- Joined
- Jul 3, 2018
- Messages
- 128
- Reaction score
- 35
- Points
- 28
Thanks for that Ian.
Did you happen to take any photos of screw & clip location. I think a "how to" would be really useful (unless it has already been done)?
This is the state of mine, which is why I would like to tackle it, but I don't want to damage anything in the process.
Cheers
Did you happen to take any photos of screw & clip location. I think a "how to" would be really useful (unless it has already been done)?
This is the state of mine, which is why I would like to tackle it, but I don't want to damage anything in the process.
Cheers
Attachments
-
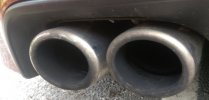 TIPS.jpg182 KB · Views: 2,010


