What's new
Peugeot RCZ Forum

Register a free account today to become a member. It's free! Once signed in, you'll be able to participate on this site by adding your own topics and posts, connect with other members through your own private inbox and take part in competitions!

Reversing camera & sat nav

Neville

New Member
Joined
Dec 28, 2019
Messages
29
Reaction score
12
Points
3
Location
Melbourne, Victoria, Australia
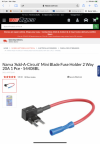
I have been wanting to install a reversing camera but wasn’t sure about placement of the screen. I found a Uniden iGo Cam 85R dashcam with a rear view camera that also acts as a reversing camera. I installed with a hard wire kit and the reversing camera is activated by tapping into the reversing lights circuit.
29EBB942-AF4E-4674-AE24-744042A32B4D.jpeg
Full forward view
E4D43EA0-ADB1-4166-9D13-20F388A2E034.jpeg
Reversing image
58D0B5E9-18C3-495B-BF27-94C9AACF60A5.jpeg
Image within image
270C9833-76E1-4EB1-AF32-D02FF693B95C.jpeg
Camera
 

natty

New Member
Joined
Jul 10, 2021
Messages
2
Reaction score
0
Points
1
Location
essex
That looks brilliant, what a great job. I've recently installed cameras into my sons car and it was a pain in the ... to run the cables. How did you find the install ? Looks really neat
 

Neville

New Member
Joined
Dec 28, 2019
Messages
29
Reaction score
12
Points
3
Location
Melbourne, Victoria, Australia
Running the cables was the biggest challenge. First, I reviewed all the existing threads on this site - really useful. I removed the boot lining on the LHS and installed the rear facing camera. I went slightly off centre to avoid the boot opening button and reversing lights. I removed the LH door sill channel cover and the screws holding down the inside rear quarter panel where the speaker is located. Running the cables over the wheel arch and into the cabin quite easy. it was a bit difficult running the cable under the inside quarter panels (no need to remove the panel) to reach the sill channel but once through quite easy to tuck the cable right up to the fuse box behind the glove box (right hand drive car). Cable tied into place then replaced the trim. I mounted the camera on the drive’s side and tucked the cables under the head lining and down the A pillar to the fuse box after removing the trim cover. I used two mini fuse blade piggy back units to source power. One from an always on battery fuse and one from an ignition on only fuse. Earth to an existing bolt on the chassis accessible by removing the panel cover on the side of the dash and close to the fuse box. After I put everything back, I realised I should have taken some photos! DF62B0D6-19FB-4B34-9482-E9A3FFF9D8BA.png
 

Attachments

  • E844BAB6-85A6-473C-8141-BAC247E8876D.png
    E844BAB6-85A6-473C-8141-BAC247E8876D.png
    145 KB · Views: 7
  • D68AA11E-F2E5-46BF-86F1-7281EC031133.png
    D68AA11E-F2E5-46BF-86F1-7281EC031133.png
    145 KB · Views: 6

Blondie

Member
Joined
Oct 1, 2019
Messages
46
Reaction score
47
Points
18
Hi can you tell me how long did it take you to fit the camera
 

natty

New Member
Joined
Jul 10, 2021
Messages
2
Reaction score
0
Points
1
Location
essex
Thanks so much for the additional information, apologies I haven't been around much to reply. Thanks very much, very useful indeed.
 
Top